CI/CD for Salesforce Applications with a Step-by-Step Hack

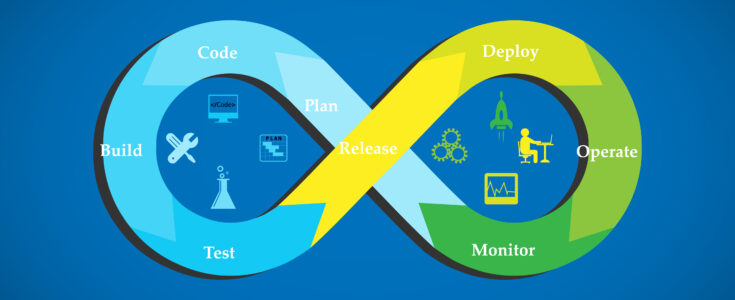
Ensuring you have reliable software builds every time is part of any critical process in the software development life cycle. Despite its importance, people are often surprised when this part is missing. Making a fully automated and reproducible build, including testing, which runs many times a day, is essential because it allows each developer to integrate daily and frequently. This, in turn, reduces integration problems. In this blog, we will look at how to achieve CI/CD for Salesforce applications and components.
Continuous integration is achieved using CI tools (Jenkins, TravisCI, CircleCI, etc.) that talk to your version control system (Git, VCS, etc). Teams can set up the CI tools of their choice in the repository and define when test suites should be run. Upon configuring the CI tools with the repository using required rules, the script is triggered, which builds, runs test suites, and deploys the component to the target environment/destination. CI tools provide logs at the end of script execution, which helps the team analyze the result and/or fix bugs.
For teams looking to achieve CI for Salesforce applications or components, it is best to run the CI either on a sandbox or on scratch orgs. That is because when it comes to achieving CI execution, it is always recommended and preferable to test the work in a disposable environment (like scratch org).
Salesforce CLI comes to the rescue
Salesforce CLI (command-line interface) helps automate the creation of a scratch org as part of the CI process. The remarkable thing about this is that Salesforce CLI enables the developer to create all the tasks in a script form, which can be part of the CI configuration file.
How to set it up
There are two main approaches to setting up Salesforce CLI. One is the Package Development model, which uses scratch orgs and unlocked packages to deploy the changes. The Org Development model, by contrast, uses a sandbox and Metadata API to deploy the changes, and this is the one we’ll look at more closely in this blog. We will assume that Jenkins is the CI tool and Github is the version control system used in the Org Development model, and that Visual Studio Code is used to develop the Salesforce lightning web component.
Configure and set up environment
Step 1: Download, set up and configure VS Code (https://code.visualstudio.com/Download) https://trailhead.salesforce.com/en/content/learn/projects/quick-start-lightning-web-components/set-up-visual-studio-code)
Step 2: Download Salesforce CLI and install it into your machine for the appropriate operating system.
Step 3: Install the latest Salesforce DX: Open the command prompt and then run the below command. sfdx plugins:install salesforcedx@latest
Once you have successfully installed the latest version of Salesforce, run the below command to update the CLI sfdx update
Step 4: Create SFDX Project Open Visual Studio Code and follow https://trailhead.salesforce.com/content/learn/projects/quick-start-lightning-web-components/create-a-hello-world-lightning-web-component?trailmix_creator_id=strailhead&trailmix_slug=build-your-developer-career-on-salesforce
Jenkins Configuration
Step 1: Set up Jenkins global environment variables for your Salesforce consumer key and username. Note that this username is the username that you use to access your Salesforce org.
- Create an environment variable named SF_CONSUMER_KEY.
- Create an environment variable named SF_USERNAME
Step 2: Store the generated server.key file as a Jenkins secret file using the Jenkins Admin Credentials interface. Make a note of the new entry’s ID.
Step 3: Set up Jenkins global environment variable to store the ID of the secret file you created.
- Create an environment variable named SERVER_KEY_CREDENTALS_ID
Build automation and deployment using the Org Development Model (i.e. deployment to sandbox and Metadata API)
Step 1: Register your test environment (i.e. authenticate with your sandbox)
sfdx force:auth:web:login -a YourSandboxAlias
Step 2: Confirm that the org is available
sfdx force:org:list
Step 3: Create a folder to put the converted files called sourceoutputdata
mkdir sourceoutputdata
Step 4: Convert source to metadata format
sfdx force:source:convert -d sourceoutputdata
Step 5: Deploy it to testing (sandbox) environment
sfdx force:mdapi:deploy -d mdapioutput/ -u YourSandboxAlias -w 100
Step 6: Run your tests and interact with the app
sfdx force:org:open -u YourSandboxAlias
That’s it, and we hope you found this guide useful. Let us know how you get on in the comments below, or if you would like more support on any aspect of CI/CD.


